A brief guide to painting table football figures
 Stage one - Undercoating the figures will give the colours a bright quality and lets you leave any white areas unpainted as they have already had a coat of white spray.
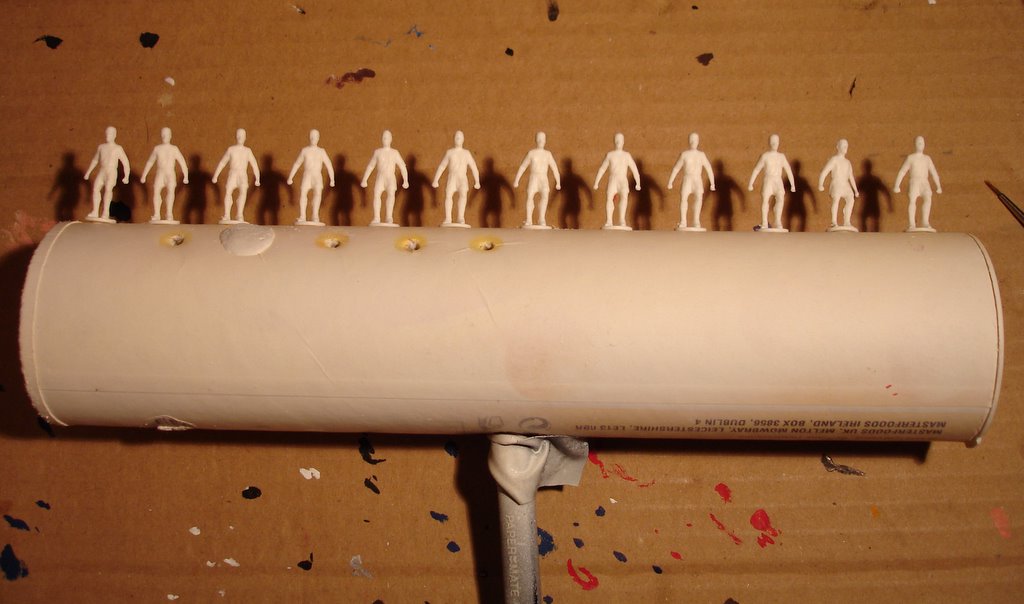
A good way of spraying figures is to punch a series of holes in a cardboard tube with a handle made from an old pen. This allows you to spray a whole team in one go.
 Stage two – Start by painting the skin areas – choose short or long sleeved shirts at this stage.
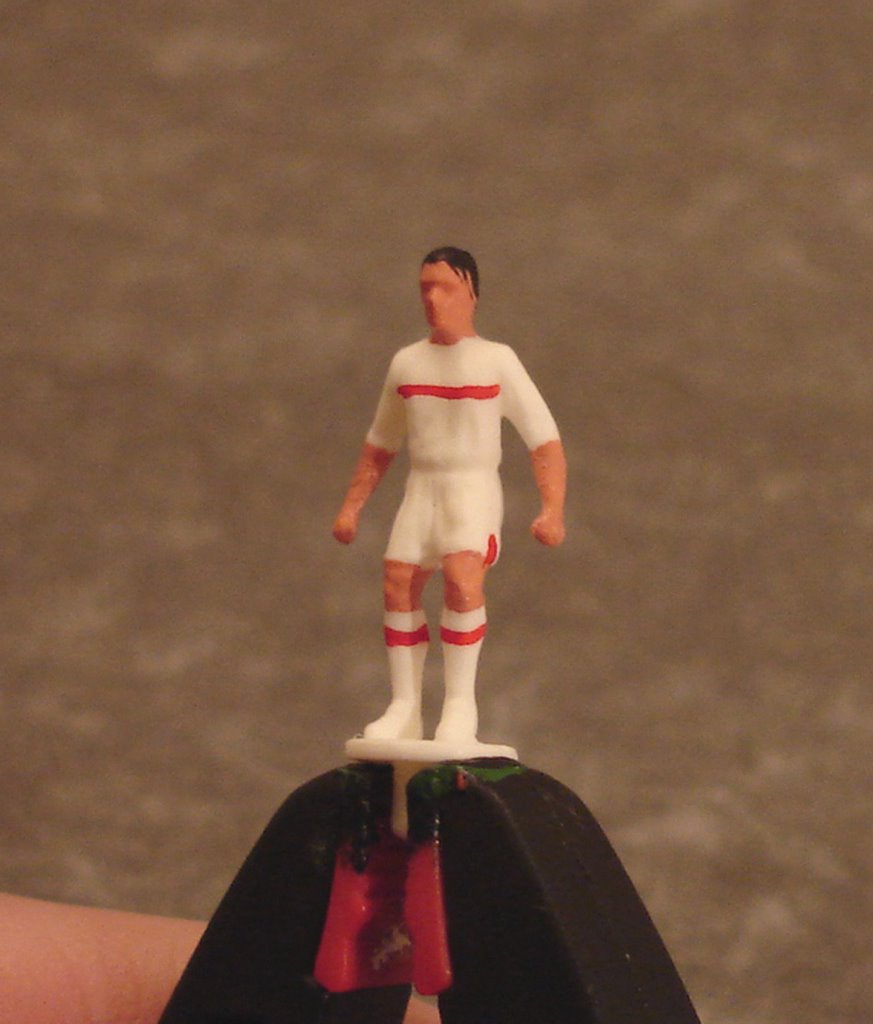
Stage three – Work out which colours cover others easily and which don’t – i.e. with a yellow and black kit - black covers yellow, but yellow doesn’t cover black, so use the yellow first. If you needed to paint back over the black, paint it white, then yellow on the white when dry. In this example I have put in the red detail on the shirt, shorts and socks as red doesn’t cover other colours very well.
 Stage four – Next add the black lines on the shirt detail, the drawstring on the shorts and some detail on the boots. The black line running onto the sleeve is not a problem as the blue covers the black paint.
 Stage five – The large area of blue on the shirts is painted next – try to get straight lines across the front, so that you don’t need to use white at all on the front of the shirts. Also add small detail of blue on shorts.
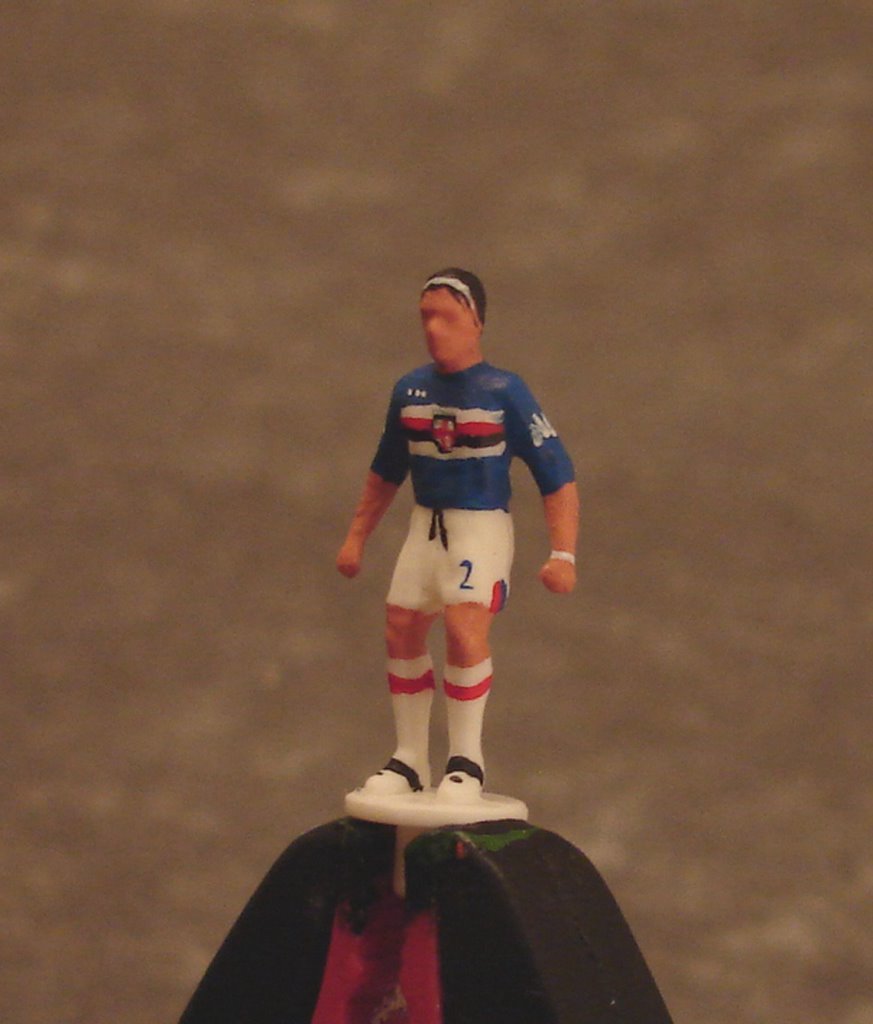 Stage six – At this stage, you can add the finishing touches – the white on the black shield, with a red cross on it, the shirt manufacturers logos on the sleeves, the number of the front of the shorts and back of shirts. Also touch up the skin areas as necessary. On this particular player, I have added a white hair-band and wristband – other details you can try – facial hair, dreadlocks and different colours and styles of boots.
Other hints and tips
- I use the excellent range of water based acrylics available at ‘Games Workshop’ stores.
- I clamp the players into pliers to save holding the small base of the figure.
- When painting sponsors on the shirts, try to create an illusion of accuracy - .i.e. ‘Carlsberg’ painted with a ‘C’ followed by a wiggly line can often look better and more effective than trying to paint every letter – often ending up with messy results.
- When painting a team, try painting each stage on three or four players at a time. Any more than that, and the process can become to much like a production line.
- Neat basic painting looks better than detailed painting that is messy.
- There are some great kits out there – I often research sports kits websites on the internet and clubs websites.
- Most importantly - Enjoy it!
If you have any comments, questions or feedback, feel free to email me at:
posted by Paul at
12:39 PM
|
3 comments
![]()
